
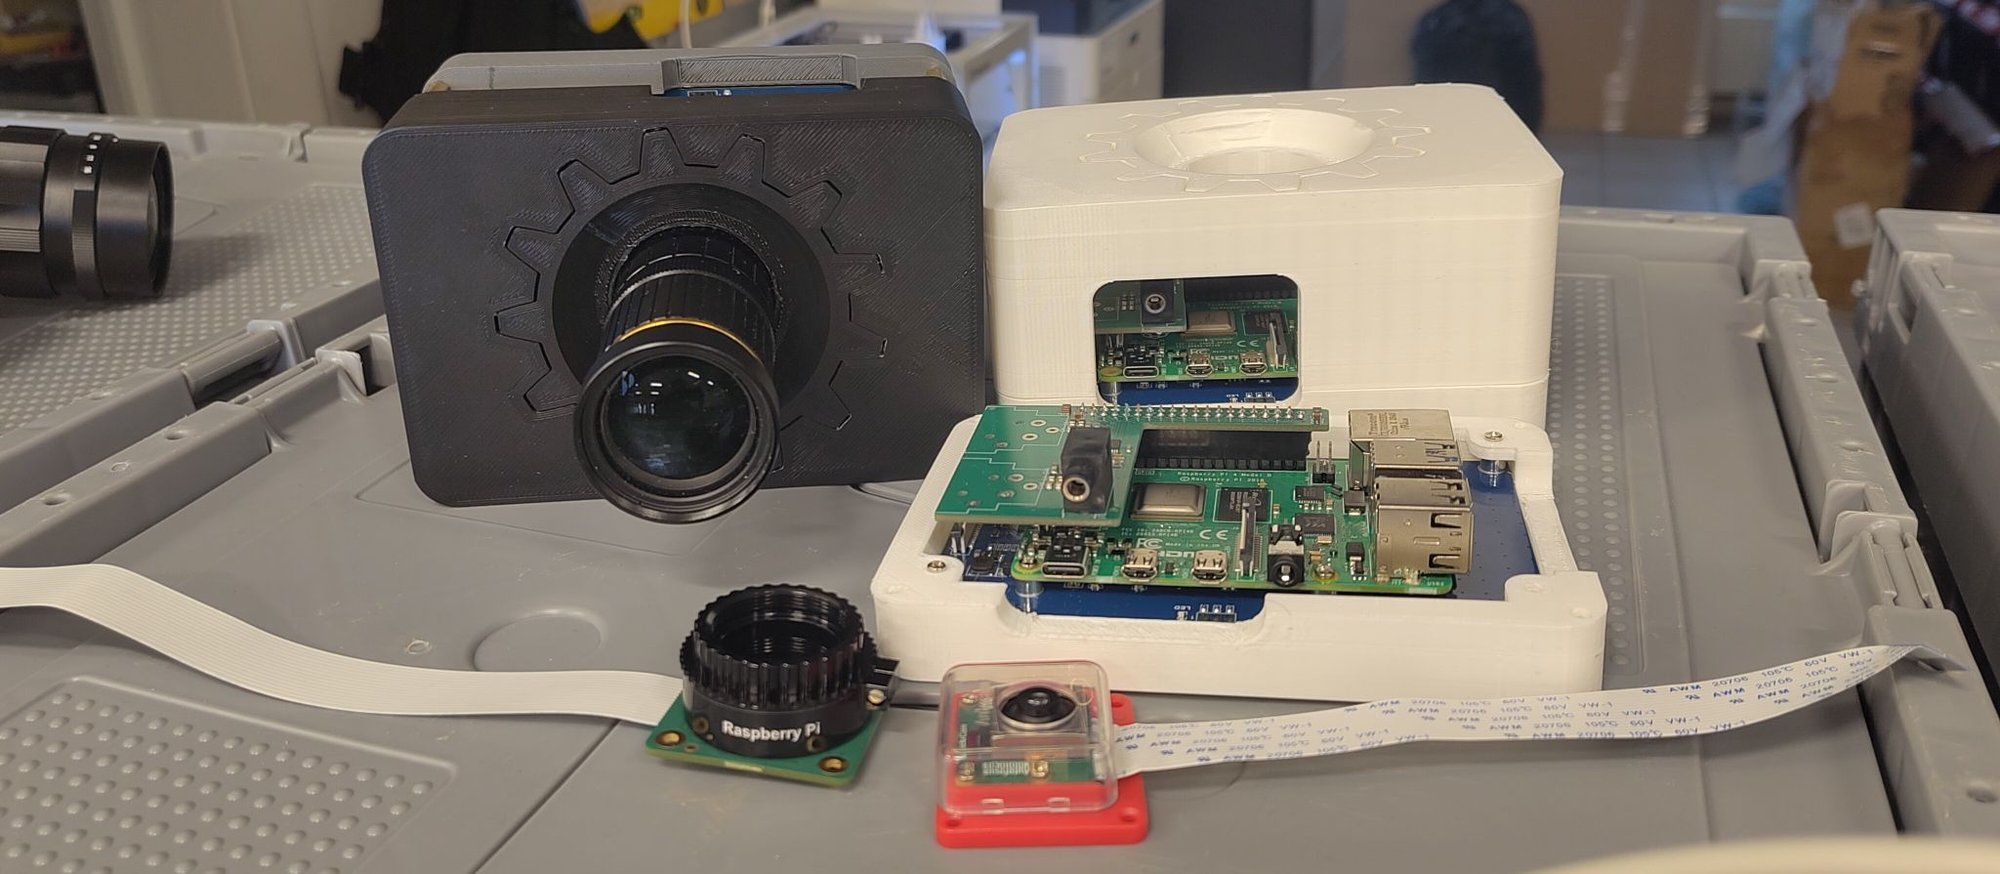
It's now about a month after the previous update on the camera hardware and a lot of new things have happened. The most obvious one from the picture above is that the case has been replaced by 3d printed parts.
I finally got the displays I wanted to use for this camera from Waveshare, the 5" inch ones that are not native-portrait orientation. With this I can now actually run the user interface full screen in the right orientation on the display. Since this display is slightly lower resolution the interface has become a bit more cramped though.
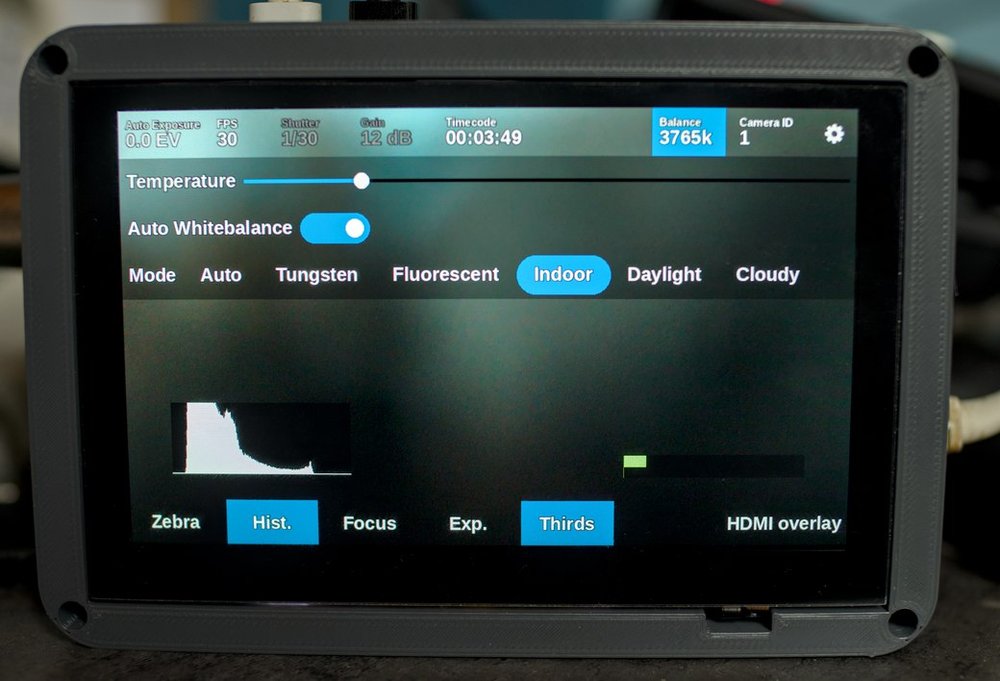
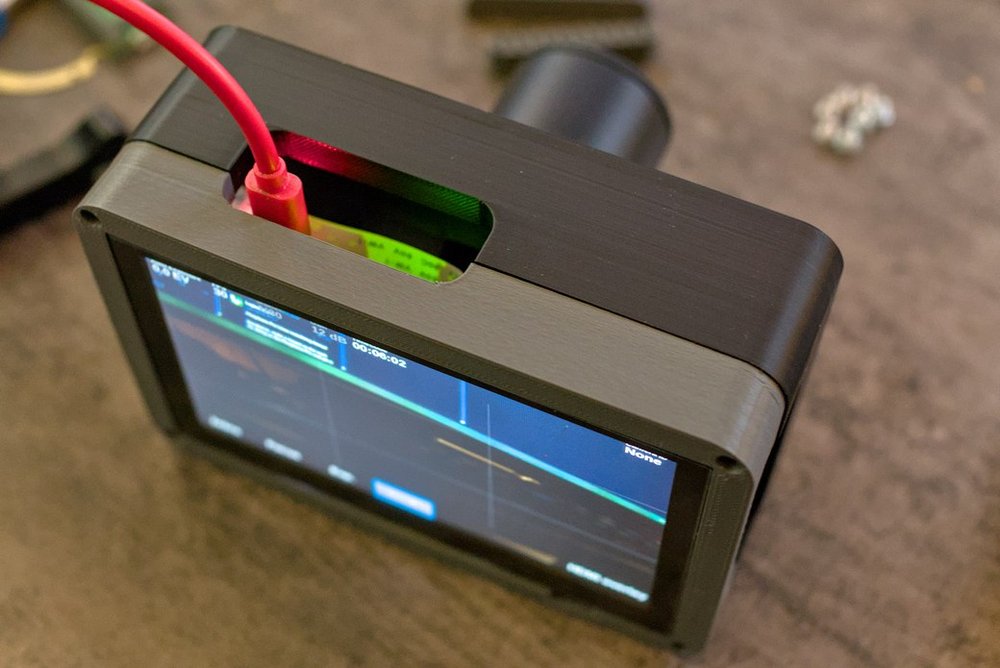
Quite a few small improvements and additions have been made, like buttons for whitebalance control and a histogram overlay. There's now also an overlay for audio levels and audio is actually outputted on the HDMI output.
Case design
I needed a simple case design to keep the parts of the new prototype together. Mainly because the new displays don't have the convenient edge that allows them to be held by the old wooden case. This design is made in OpenSCAD and printed in two halves to not have excessive overhangs.
Due to this prototype being an off-the-shelf raspberry pi it has issues with weird connector placements, like the power and micro HDMI output on the top of the camera and ethernet on the side. The Raspberry Pi is really not designed to easily be exposed from a case this way. I've used the Pi mounting points on the back of the display module to mount the Pi and this also means the connectors are quite deep inside the case because those mounting points move the Pi to the center of the screen.
With this case design the display module is inset into the case by ~0.5mm so the the display won't get scratched nearly as easily and should be protected a bit by the plastic edge. The whole sensor/lens-mount assembly is also inset into the case quite a bit to make that part not stick out when the lens cap is mounted on it with the C-to-CS adapter ring still being on the lens mount.
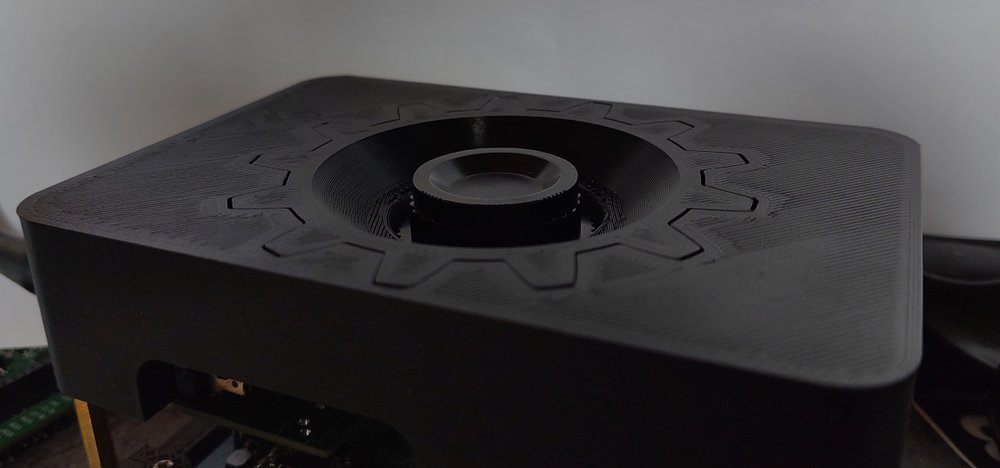
With this all together it means that if the cables are disconnected it's one nice cube with nothing sticking out of it and if it falls the force will be absorbed by breaking PLA instead of the actual camera parts.
Audio support
One of the downsides of the Raspberry Pi is that it has no audio input. One of the design requirements for this camera would be feeding in audio so it is injected into the HDMI output so that needs to be fixed. There's many expansion boards available for the Raspberry Pi to give it better audio outputs, some even give it good audio inputs. This is possible due to the i2s bus being available on the 40-pin header so extra audio devices can be attached.
Building a simple i2s audio input is not terribly hard, I've already figured out that part building the FOSDEM audio mixer so I copy/pasted some parts of that design to make a small board that has two XLR inputs for feeding in balanced stereo audio. I swapped out the ADC chip I had used in the FOSDEM mixer design to one that has a slightly older one that has a nice driver already in Linux mainline to avoid figuring out that part of the software stack.
The ADC chip I ended up on is the Texas Instruments PCM1862 stereo ADC. This has the built-in PGA which means I immediately have some great analog gain control from Linux userspace. The nice thing of this chip is that while it has only 2 ADC channels internally it actually has 8 inputs available which can be muxed to the ADCs using software. I've used this functionality to also add a 3.5mm stereo jack as input and two built-in microphones so you can have some audio available without attaching external stuff.
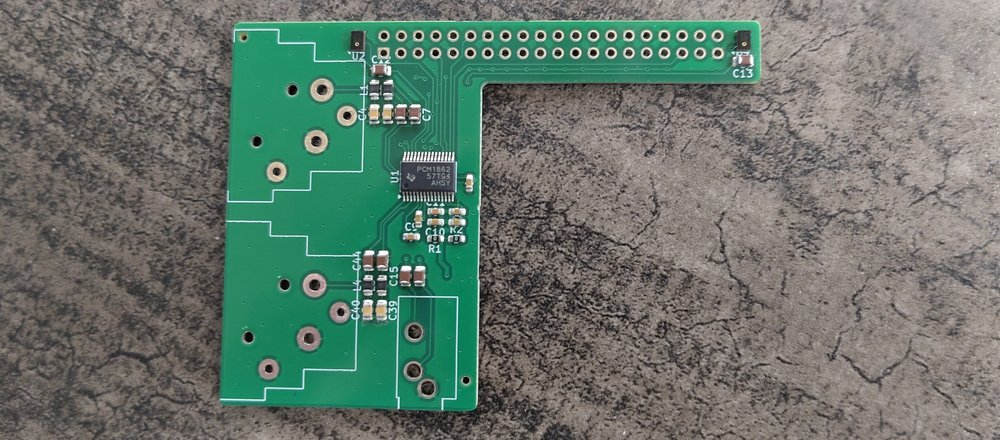
As you can see the board is very simple. Basically just some filtering and connecting everything straight to the ADC chip. On the left and right side of the Pi header you can see the tiny microphones that are used for the stereo internal input.
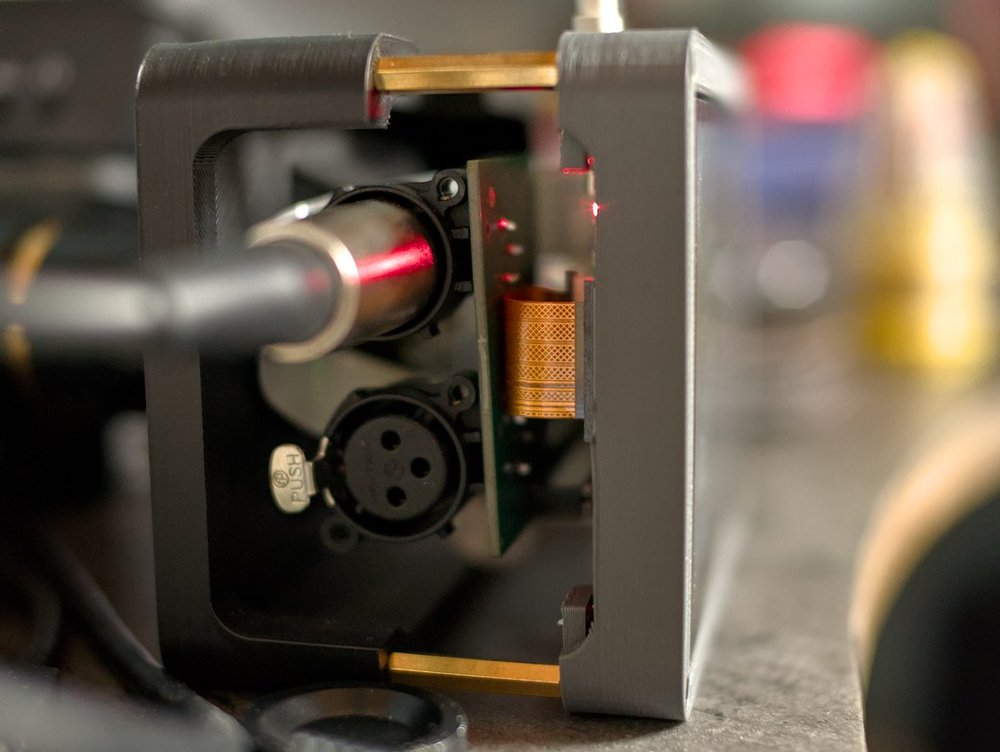
This board arrived a bit later than all the other parts though, specifically it arrived after I printed the case and this case wasn't designed to fit this audio board. Luckily the Waveshare display came with some spacers that fit between the two halves of the case to create some extra space.
This is also the point where I found out that getting the audio to work in Linux was going to be slightly more complicated than hooking up the driver using a device tree overlay. The "simple-audio-card" driver in Linux that's for hooking up these basic things doesn't seem to have a way to actually expose all the controls I want for the ADC so I had to add a glue driver. This seems like a pretty common problem since a significant amount of overlays for audio board for the raspberry pi have a glue driver that just create the links that simple-audio-card would make plus some additional controls.
This is why the mncam repository now also contains a Linux kernel module for dealing with the audio, based around the glue module for the HiFiBerry ADC board that uses the same ADC chip.
The audio board creates all the controls in ALSA so they are just visible using alsamixer to configure the analog gain and input routing. The camera application then just uses that abstraction to render the audio settings page:
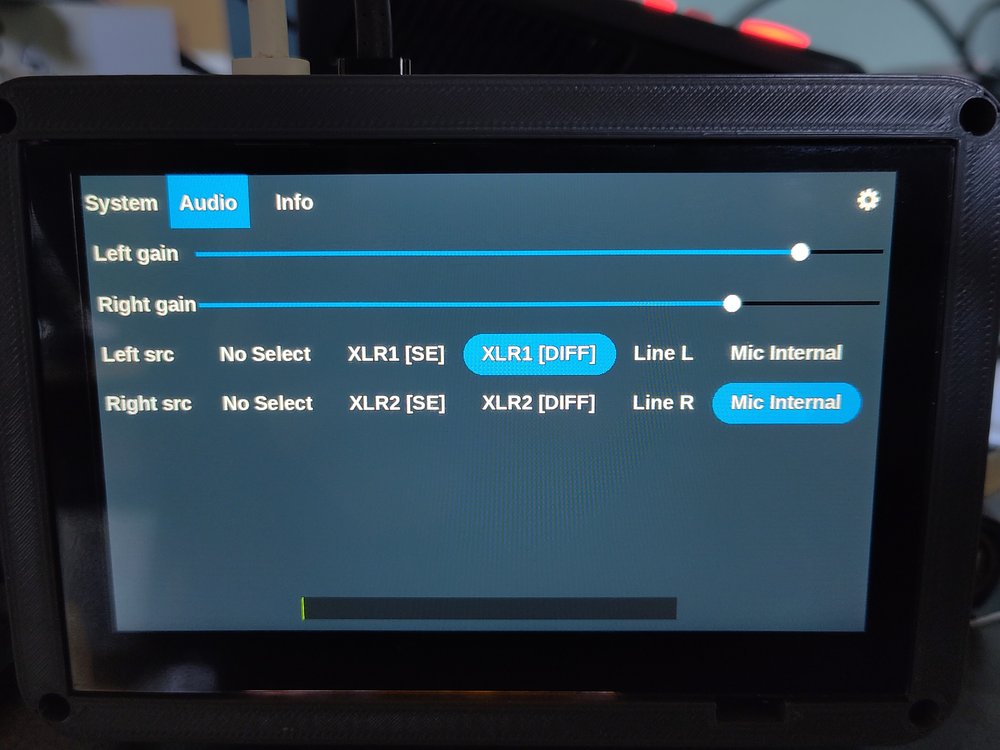
The ADC has the option to link two channels to have a differential input, which is used for the XLR inputs for better noise performance with long cables. But I've noticed that some cheap XLR microphones produce less noise when they are used as a non-differential signal, in that case the Single Ended option can be used to use only two of the three pins in the XLR plug.
Image quality tests

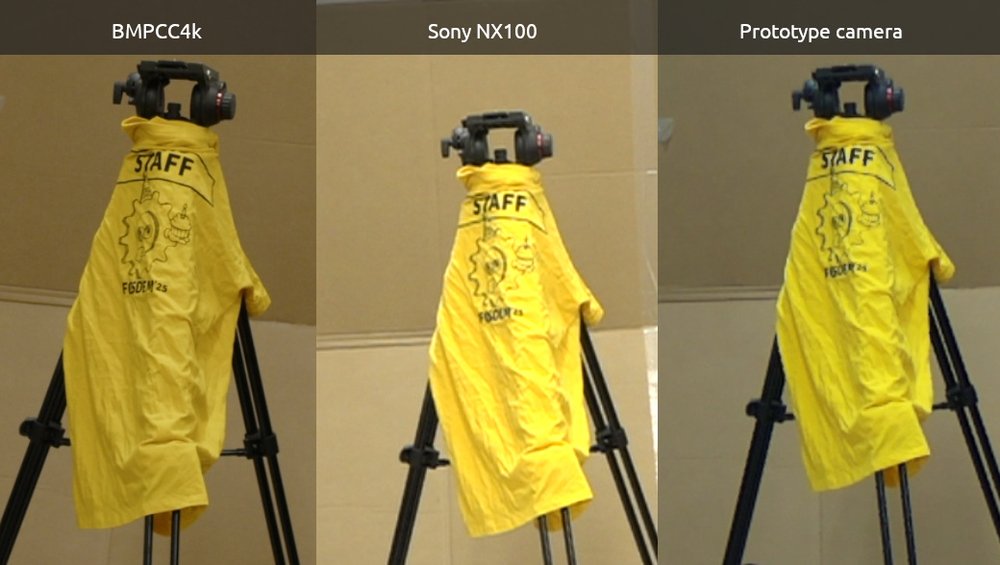
While at the FOSDEM hackathon I had the oppertunity to compare the image quality of my camera prototype. I've been using my Blackmagic Design Pocket Cinema Camera 4k as my image quality reference and my prototype looks pretty cheap in comparison. But the Sony NX100 cameras used for streaming FOSDEM are not the newest anymore and in the noise performance of my prototype was actually pretty similar and the colors seem to be a bit nicer in some cases.
I also wanted to check out if the larger OwlSight sensor from Arducam would produce better image quality, according to the specs it should at least have less noise due to it being a Starvis2 sensor. In practice this sensor just had significant artifacts which made the image quality pretty bad, in the end I did use it to implement focus controls in the camera software though.
Next prototype
The current prototype certainly produces promising results. So now I'm continueing on the new prototype that uses a custom carrier for a Raspberry Pi Compute module to have better I/O access on the outside of the camera and directly integrate a slightly more complete version of the audio inputs. Switching over to the compute modules also gives access to 4-lane MIPI cameras giving a bit more flexibility with sensor selection.