

MNT Research is one of those few companies that actually releases open source hardware. Instead of just getting a schematic with your hardware (which is great even by itself) there's the full sources for that schematic, the Kicad parts libraries, the sources for the firmware and even documentation how to use that code.
I received my MNT Standalone Keyboard V3 a few days ago so I've been typing on it now for a bit. This is all happening while I'm recovering from covid so I hope if I read back this post in a few days it is actually somewhat coherent :)
This being a more niche product sadly does make it a bit on the expensive side. But I must say this is by far the most solid keyboard I've owned. My main keyboard on my desktop is an Das Keyboard 4 ultimate. It's a nice keyboard but it doesn't compare to the full machined aluminium frame on the MNT keyboard.
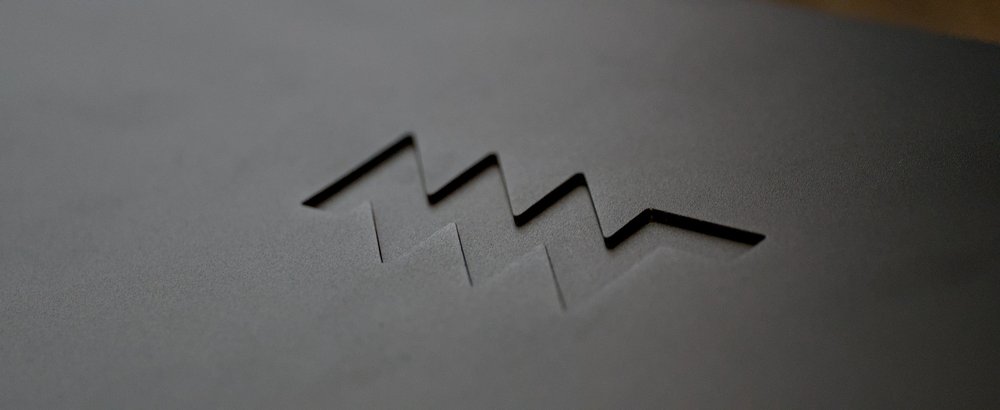
The whole keyboard is mounted on what's basically a 4mm slab of aluminium which has a nice MNT logo machined on it on the bottom
This makes the keyboard feel incredibly solid, even with the rest of the frame taken off it's practically impossible to even bend the keyboard. The second half of the frame is the top edge that screws on the base plate with 8 screws.
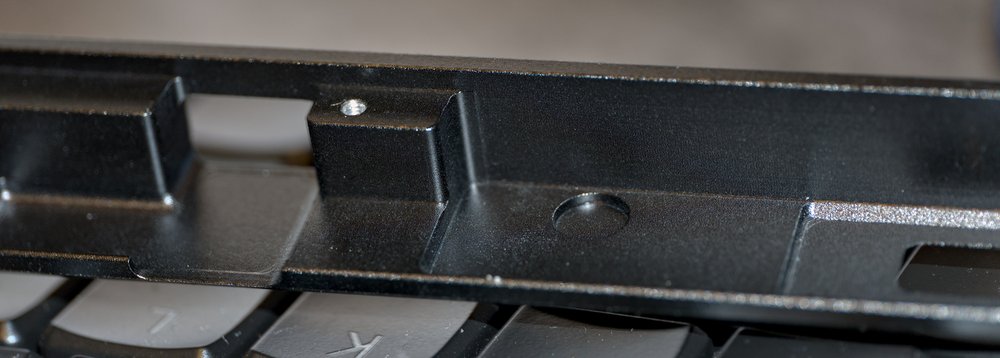
This is another very carefully designed aluminium part In the close-up above you can see the opening for the USB-C connection for the keyboard and the internal cutouts for the display daughterboard with the screw mounting.
The electronics
This keyboard is based around an Atmega32U4 microcontroller. This is the same keyboard PCB as what's shipped in the MNT Reform laptop so there are two connectors on this board. The USB-C connector is what's exposed on the standalone keyboard and the laptop presumably uses the USB header that's beside it.

Beside the USB header is one of the dip switches. SW36 is labeled "STANDALONE" here. This switches the board to use USB power instead of the 3.3V supplied by the laptop mainboard. The ribbon connector is the connection to the OLED display board.
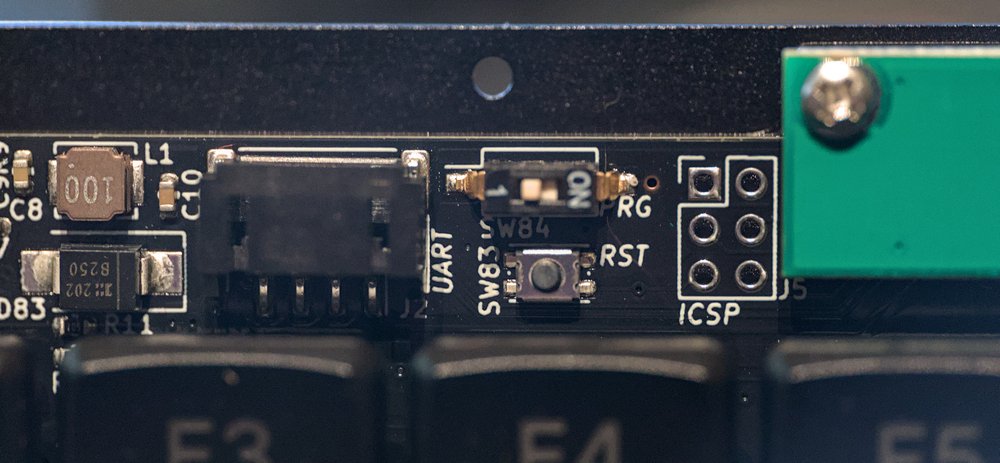
On the left side of the display board there is an empty footprint for the standard Atmega programming header and a serial port that's used to connect to the laptop mainboard. Additionally there's a reset button and SW84 which has the confusing label "RG".
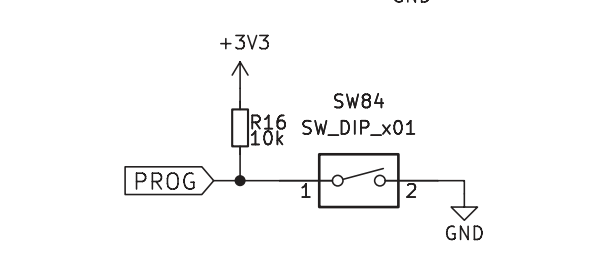
Thanks to the schematics being available in the manual it's easy to find that this is the switch to enable programming. The rest of the interesting parts is hidden somewhere below the display board or on the bottom side of the PCB possibly. I have not taken the keyboard further apart for this review since all the information I'd ever want is already available in the schematics. The keyboard matrix itself is read out by the Atmega directly which provides the full keyboard functionality and the OLED display is on a small daughterboard to slightly rise it towards the front bezel.
Firmware
Since this is one of the 8-bit Atmel parts it's very easy to build firmware using the gcc-avr compiler packaged in various distributions. All the source files are stored in the firmware repository for the various MNT products.
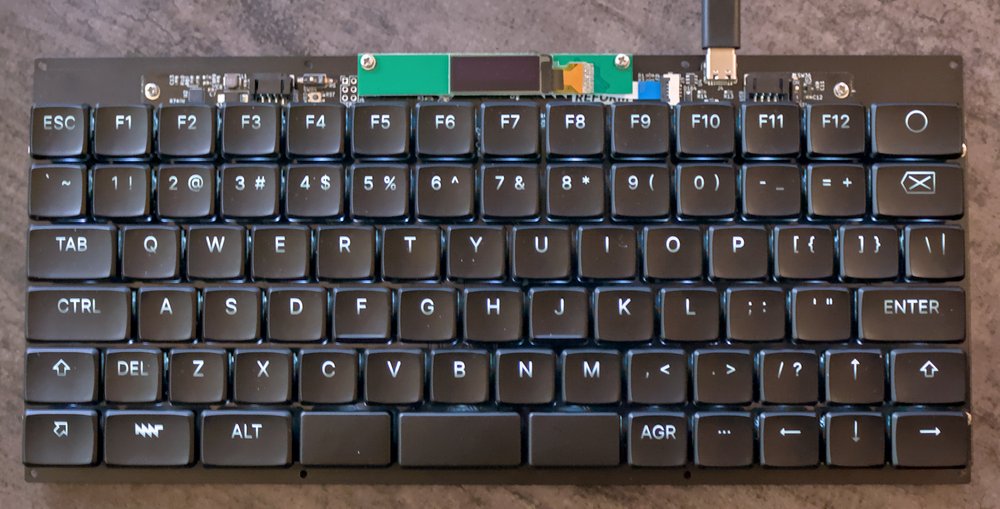
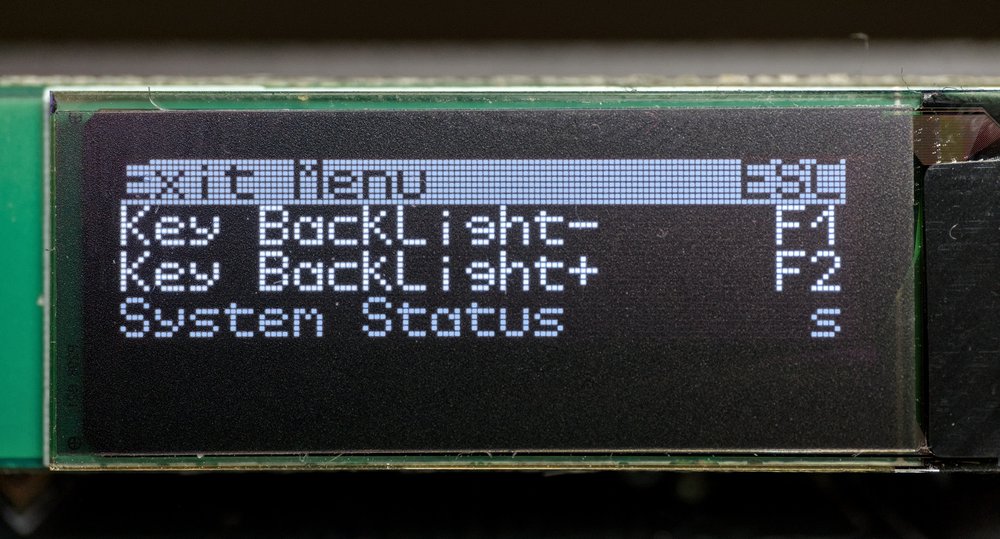
Checking the version of the firmware is pretty easy. With the circle key on the top-right corner of the keyboard the menu on the display opens. You can use the arrow keys to browse to the "System Status" option or just press the "s" key on the keyboard.
Which shows the hardware revision this firmware was build for and the version that was specified when building:
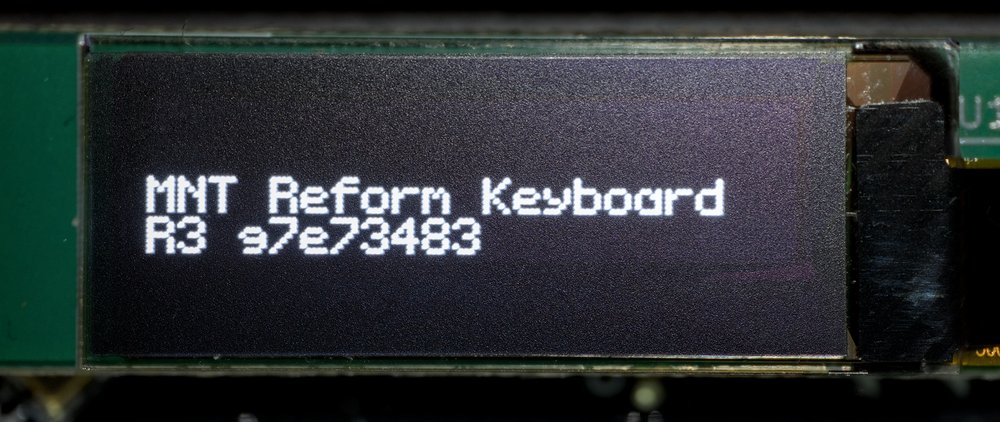
It seems like the "g" at the start of the commit has was accidental here and it refers to commit 7e73483 in the firmware repository. This seems to be the newest tag when the keyboard was shipped so that makes sense.
So lets change something! The key in the bottom left corner of the keyboard is the Hyper key instead of Ctrl as you'd expect from most keyboards. The Ctrl key is moved in place of the Caps Lock button on normal keyboard layouts which is great for a lot of uses. I never use Hyper though so I want to change that key to be my second Ctrl key.
The readme specifies that the keyboard layout is defined in the various matrix_* files so after reading around a bit it seems like I have to edit matrix_3.h for my keyboard.
Reading the manual again I realized that doing this makes me lose access to the media keys since those are defined as "Hyper+F*" for the various media actions. To fix that I changed the right control button into the Hyper key, this is the button with the three dots on it. My resulting code change:
diff --git a/reform2-keyboard-fw/matrix_3.h b/reform2-keyboard-fw/matrix_3.h
index bb72f6d..f9db133 100644
--- a/reform2-keyboard-fw/matrix_3.h
+++ b/reform2-keyboard-fw/matrix_3.h
@@ -25,7 +25,7 @@

 // Sixth row
 #define MATRIX3_DEFAULT_ROW_6 \
-  HID_KEYBOARD_SC_EXECUTE,\
+  HID_KEYBOARD_SC_LEFT_CONTROL,\
   HID_KEYBOARD_SC_LEFT_GUI,\
   HID_KEYBOARD_SC_LEFT_ALT,\
   KEY_SPACE,\
@@ -33,7 +33,7 @@
   KEY_SPACE,\
   KEY_SPACE,\
   HID_KEYBOARD_SC_RIGHT_ALT,\
-  HID_KEYBOARD_SC_RIGHT_CONTROL,\
+  HID_KEYBOARD_SC_EXECUTE,\
   HID_KEYBOARD_SC_LEFT_ARROW,\
   HID_KEYBOARD_SC_DOWN_ARROW,\
   HID_KEYBOARD_SC_RIGHT_ARROW
Now to build this there's a simple Makefile. Since I've already programmed Atmega parts on this machine I already have the compiler installed making this very quick and easy.
I ended up compiling with the following command:
$ make REFORM_KBD_OPTIONS="-DKBD_VARIANT_3 -DKBD_MODE_STANDALONE -DKBD_FW_VERSION=\\\"Martijn\\\""
This is straight from the readme with an additional define to set the firmware version to "Martijn". After building this I got the keyboard.hex file that can be flashed.
The flashing is as simple as running the flash.sh script. This will instruct you to press "Circle + X" to enter flashing mode and then run the neccesary commands to flash the keyboard. After running this I noticed that the delete key on the keyboard was no longer a delete key. It turns out I don't have VARIANT_3 but instead VARIANT_3_US. A quick rebuild and reflash also fixes that.
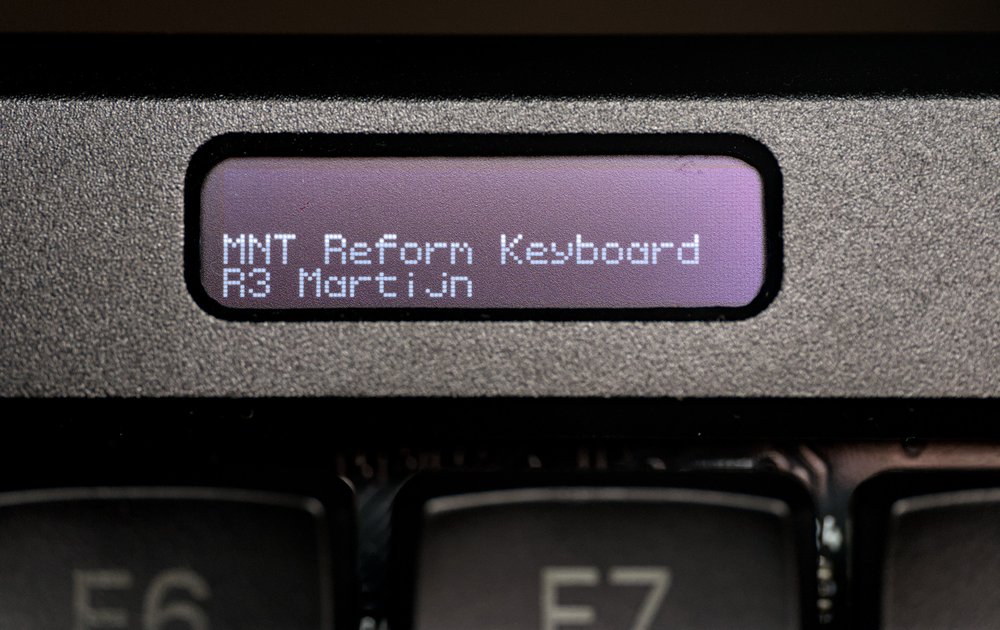
Tadaa! My own name in the firmware version field. It's super easy to mess with this firmware.
The keyboard itself
Well the keyboard works just fine as a keyboard. Typing on this keyboard takes a few minutes to get used to compared to my normal keyboard since all the keys are slightly closer together. The split spacebar is also annoying me a bit. It turns out that the left split in the spacebar is exactly the spot where I normally hit the spacebar with my thumb.
The switches are nice and clicky (but silent, I have the version with brown switches in them). Overall the keyboard just does what it needs to. The standard layout is quite unusual but everything can be changed with open firmware so I'm confident I can get to a layout I'm 100% happy with.
Conclusion
This is an extremely solid and very compact keyboard I can easily throw in my backpack. It being an USB-C keyboard makes it fit neatly with all my other random cables I usually take with me.
It might be slightly more expensive than similar keyboards, but I don't know of similar keyboards with a case this rugged and the display functionality (I forgot to mention you can use HID reports from the host to write custom content to the display from your computer). The openness of this product makes the extra cost certainly worth it for me.
I'll probably be messing with the firmware for this keyboard a bit more while I use it. There's some small things to fix like the device reporting the name "LUFA Keyboard Demo Application" in Linux instead of a neater "MNT Keyboard" or something.