
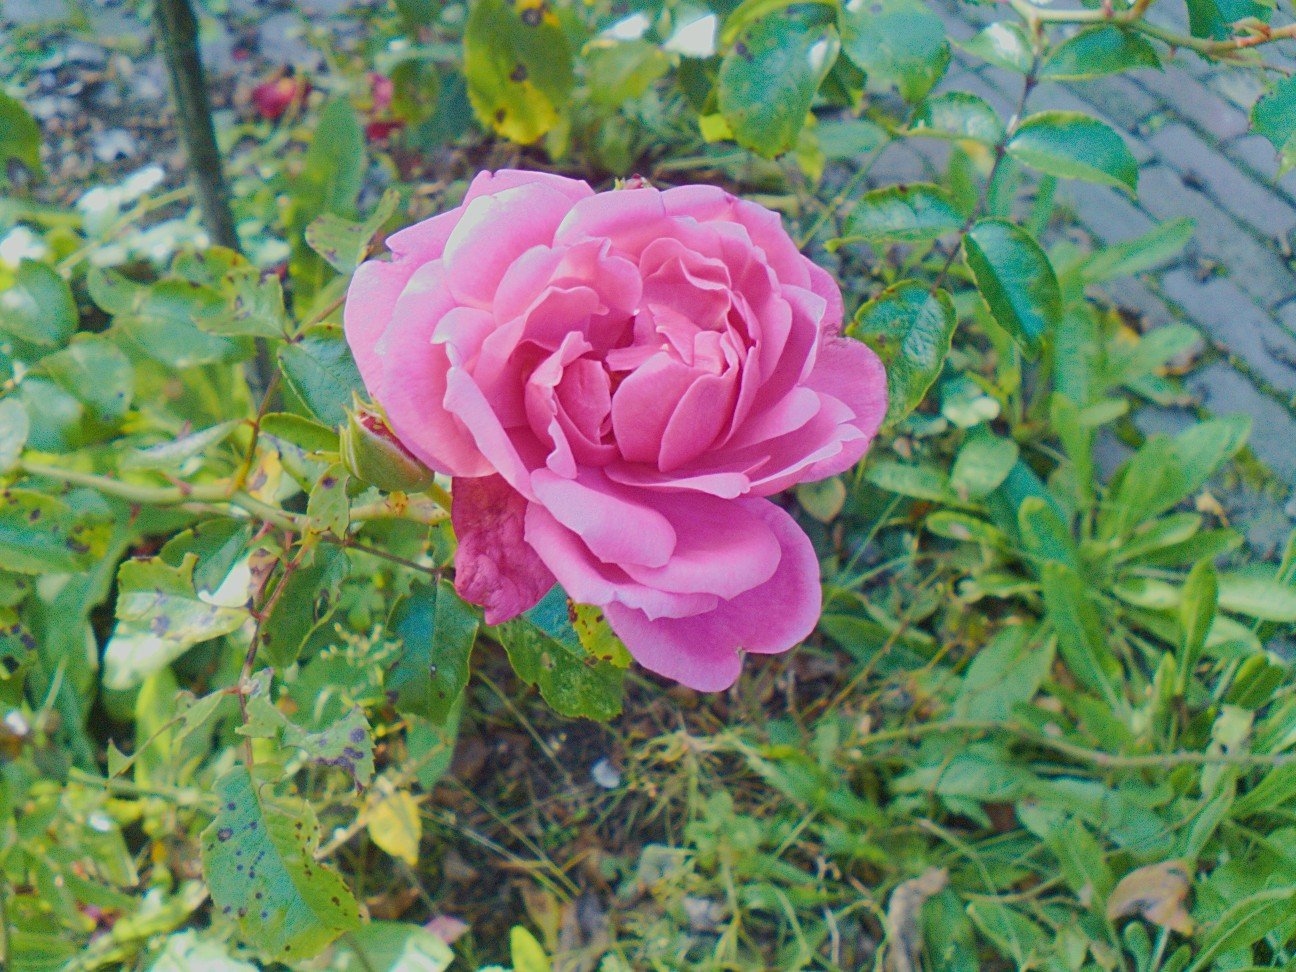
I keep writing these because things keep improving. One of the main improvements is visible in the picture above, autofocus is working.
The OV5640 sensor in the PinePhone is pretty small, this limits possible image quality but as upside it means the camera has a way larger area of the picture in focus. Due to this it can get away with not having autofocus at all. The camera just sets the lens to infinity focus when starting (which produces the clicking sound when accessing the camera) and then the focus would be mostly fine for landscapes.
The downside is that things that are close to the camera aren't in focus. This is quite a problem for me because half the pictures I take with my phone is photo's of labels on devices like routers so I don't have to write the password down to enter it on a device in another room. These photo's would be quite out of focus on the PinePhone.
The autofocus support is actually only a single line change in Megapixels to make the basic functionality work. The main changes for this have been done in the kernel driver for the ov5640. The sensor chip has a built-in driver for the focus coil in the camera module. It only needs some firmware loaded to make the focus work and some commands need to be sent to configure the focussing. The firmware upload is needed because the sensor doesn't have any built-in storage for the 4kB of firmware that can be sent, it's just stored in RAM when the sensor is powered up by Linux.

The firmware itself is a closed blob from Omnivision. It basically runs on the embedded 8051 core (that hasn't been used at all so far) and it gets a 80x60 pixels downscaled version of the camera view, from there it sends values to the focus distance register in the sensor that normally would be used for manual focussing. To trigger focus there's a few registers on the ov5640 you can write to to send commands to the firmware. The datasheet for example defines command 0x03 to focus on the defined area and 0x07 to release the focus and go back to infinity.
After implementing this Megi figured out that there's an undocumented command 0x04 to trigger continuous autofocus in the sensor. This is way more user friendly and is what's now enabled by default by Megapixels.
One of the remaining issues is that V4L2 doesn't seem to have controls defined to select where the focus should measured. The current implementation just makes the ov5640 focus on the center of the image but the firmware allows defining the zones it should use to get focus.
User facing manual controls
One of the new developments that's in Megapixels is an UI that allows users of the app to switch from automatic exposure to manual controls.

In the top row of the image the current state of the controls is shown. In this case it's the gain and exposure controls from V4L2. These controls don't have defined ranges so that's set by the config file for Megapixels.
If you tap the control in the top the adjustment row in the bottom of the screenshot will open allowing you to change the value by dragging the slider, or enableing the in-sensor automatic mode for it by clicking the "Auto" toggle button.
These controls also slightly work for the GC2145 front camera, the main issue is that the datasheets don't define the range for the built-in analog and digital gain so it can't really be mapped to useful values in the UI. The automatic gain can also only be disabled if you first disable the automatic exposure. Something that can't really be enforced in Megapixels currently so it's not super user friendly.
The next step for this would be implementing the whitebalance controls for the cameras. That would involve some math since the UI would show the whitebalance in a color temperature and tint but V4L2 deals with whitebalance with R/G/B offsets.
Color calibration
Another huge step in image quality for the rear camera is the color calibration matrices.
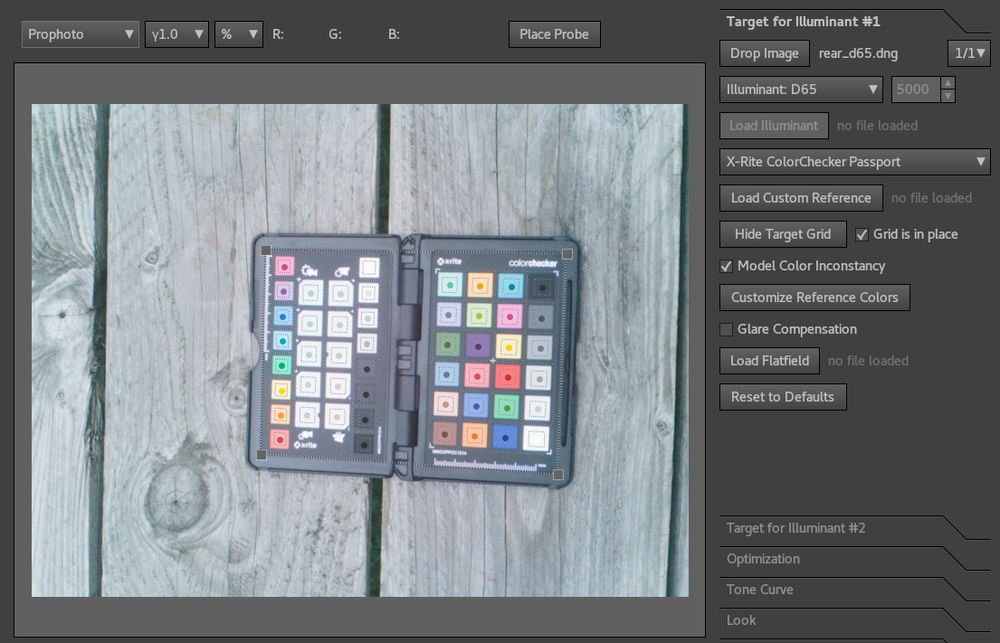
The calibration for this is done by making correctly exposed pictures of a calibrated color target like the X-Rite colorchecker passport above. Even the slightest amount of exposure clipping ruins the calibration result but due to the manual controls in Megapixels I was now able to get a good calibration picture.
For the calibration two photos are needed. Those need to be as far away from eachother as possible in the color spectrum. A common choice for this is using a Standard D65 illuminant and a Standard A illuminant, which is a fancy way of saying daylight on a cloudy day and an old tungsten lightbulb. By knowing the color/spectrum of the light used and the color of the paint in the calibration target it's possible to calculate a color matrix and curve to transform the raw sensor data in correct RGB colors.
To do this calculation I used Lumariver Profile Designer, which is a closed source tool that gives a very nice UI around DCamProf from the RawTherapee people. The license is paid for by the donations from my patreon sponsors and the license cost is used by Lumariver to continue development on DCamProf.
After running all the steps in the calibration software I get a .dcp file that contain the color matrices and curves for the sensor/lens combination. The matrices from this file are then written to the hardware config file in Megapixels in the colormatrix and forwardmatrix keys. Megapixels doesn't actually process any of this enformation itself, it only gets added to the exported raw files as metadata and the post processing tools will use it to produce better output files.
The result of the matrices is that it now takes way less messing with raw tools like RawTherapee and Darktable to get a good looking picture. The pictures just look better by default.

It might look like it's just a saturation change, but it also corrects a few color balance issues. The second thing the calibration tool outputs are calibration curves for the sensor. These do brightness-dependend or hue dependent changes to the image. These are a bit too large to store in the config file so to use those I need to find a way to merge the calibration data from a .dcp file into the generated .dng raw files instead.
New post processing pipeline
Just writing the metadata doesn't magically do anything. To take advantage of this I rewrote the processing pipeline for the photos taking advantage of the DNG code that I wrote to test the burst function. I removed the debayer code from Megapixels that did the good quality debayer when taking a photo and I removed the jpeg export function. Megapixels now only writes the burst of photos to a temporary directory as .dng files with all the metadata set. After taking a photo Megapixels will call a shell script which then takes those files and run it through the new processing pipeline.
Megapixels ships with a postprocess.sh file by default that is stored in /usr as the default fallback. You can overwrite the processing by copying or creating a new shell script and storing that in ~/.config/megapixels/postprocess.sh or /etc/megapixels/postprocess.sh.
The included processing script takes the burst and saves the first .dng file into ~/Pictures as the raw photo. Then it runs the same file through dcraw to do a very good quality debayer and at the same time apply the color matrices stored in the .dng files. Then it will run imagemagic to convert the resulting tiff file into a .jpg in ~/Pictures as the final jpeg image.
The output .jpg files are what is used in the garden pictures above.
HDR+ and stacking
Last but not least is the further development into the hdr-plus implementation. After my previous blog post one of the developers in the #pinephone channel (purringChaos) made the hdr-plus repository build that I couldn't get working last time.
The hdr-plus tool takes a burst of raw frames and aligns those to do noise reduction and get a larger dynamic range. then it runs a tonemap on the HDR file and make a nice processed image. It's basically an implementation of the photo pipeline that google made for the Pixel phones.
So far running the hdrplus binary on the photo's has resulted in very overexposed or very weirdly colored images, which might be a result of the camera not providing the raw files in a way the hdr tool expects it. Hopefully that can be solved in the future.
The hdr-plus repository does have another tool in it that just does the stacking and noise reduction though and that binary does work. If the postprocess.sh script in Megapixels detects the stack_frames command is installed it will use it to stack together the 5 frames of the burst capture and then use the .dng from that tool in the rest of the post-processing pipeline. It seems to reduce the noise in images quite a lot but it also loses most of the metadata in the .dng file so this would also need some improvements to work correctly.

I think with these changes the ov5640 is basically stretched to the limit of what's possible with the photo quality. The rest of the planned tasks is mainly UX improvement and supporting more different camera pipelines. Since postmarketOS supports a lot of phones and more and more run mainline Linux it should be possbile to also run Megapixels on some of those.
I've also received a few patches to Megapixels now with interesting features, like support for more than 2 camera's and a proof-of-concept QR code reading feature. Hopefully I can also integrate that in this new code soon.