
I've been working on a bunch of small projects involving microcontrollers. Currently a lot of them are based around the Raspberry Pi Pico boards because I like the development experience of those a lot. They have a decent SDK and cheap hardware to get started and the debugger works with gdb/openocd so it just integrates in all IDEs that support that.
One of my current projects is making a fancy hardware controller for a bunch of video equipment I use. The main things that will be controlled are two PTZ cameras (those are cameras that have motors to move them). One stationary camera and the video switching equipment that that's hooked up to.
Currently the control of the control of the PTZ cameras is done with an unbranded panel that looks suspiciously like the Marshall VS-PTC-200:
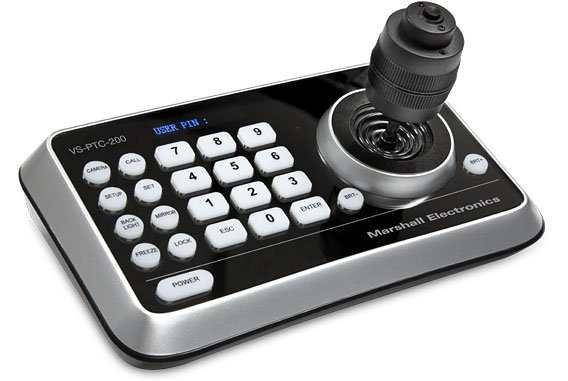
The performance of this controller is simply not very great, especially for the price. It was a €650 device several years ago and for that money it has very annoying squishy buttons and the cheapest analog joystick you could find. Most of the buttons are also not functional with the cameras in use since this seems to be optimized for security cameras. This connects to the cameras over an RS-485 bus.
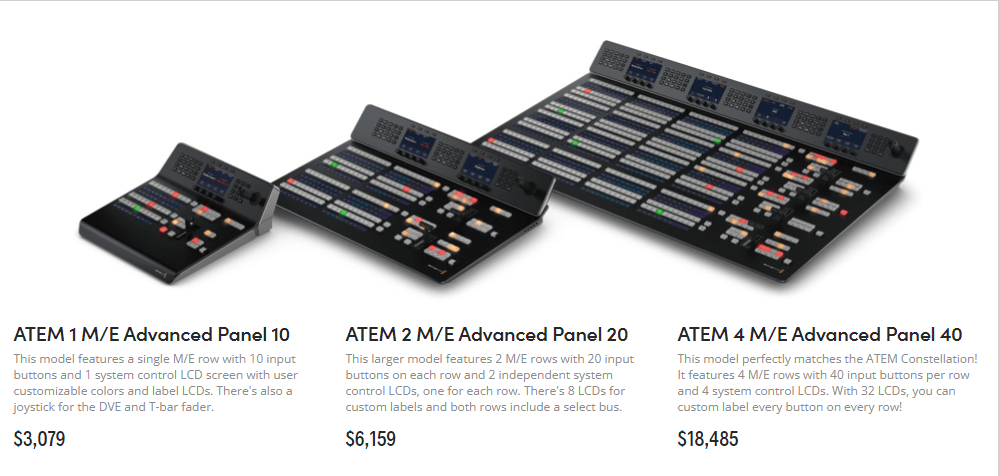
The second thing I want my panel to do is very basic ATEM video switcher control. Currently that's fully done using the software panel on the computer because the panels from Blackmagic Design are very expensive.
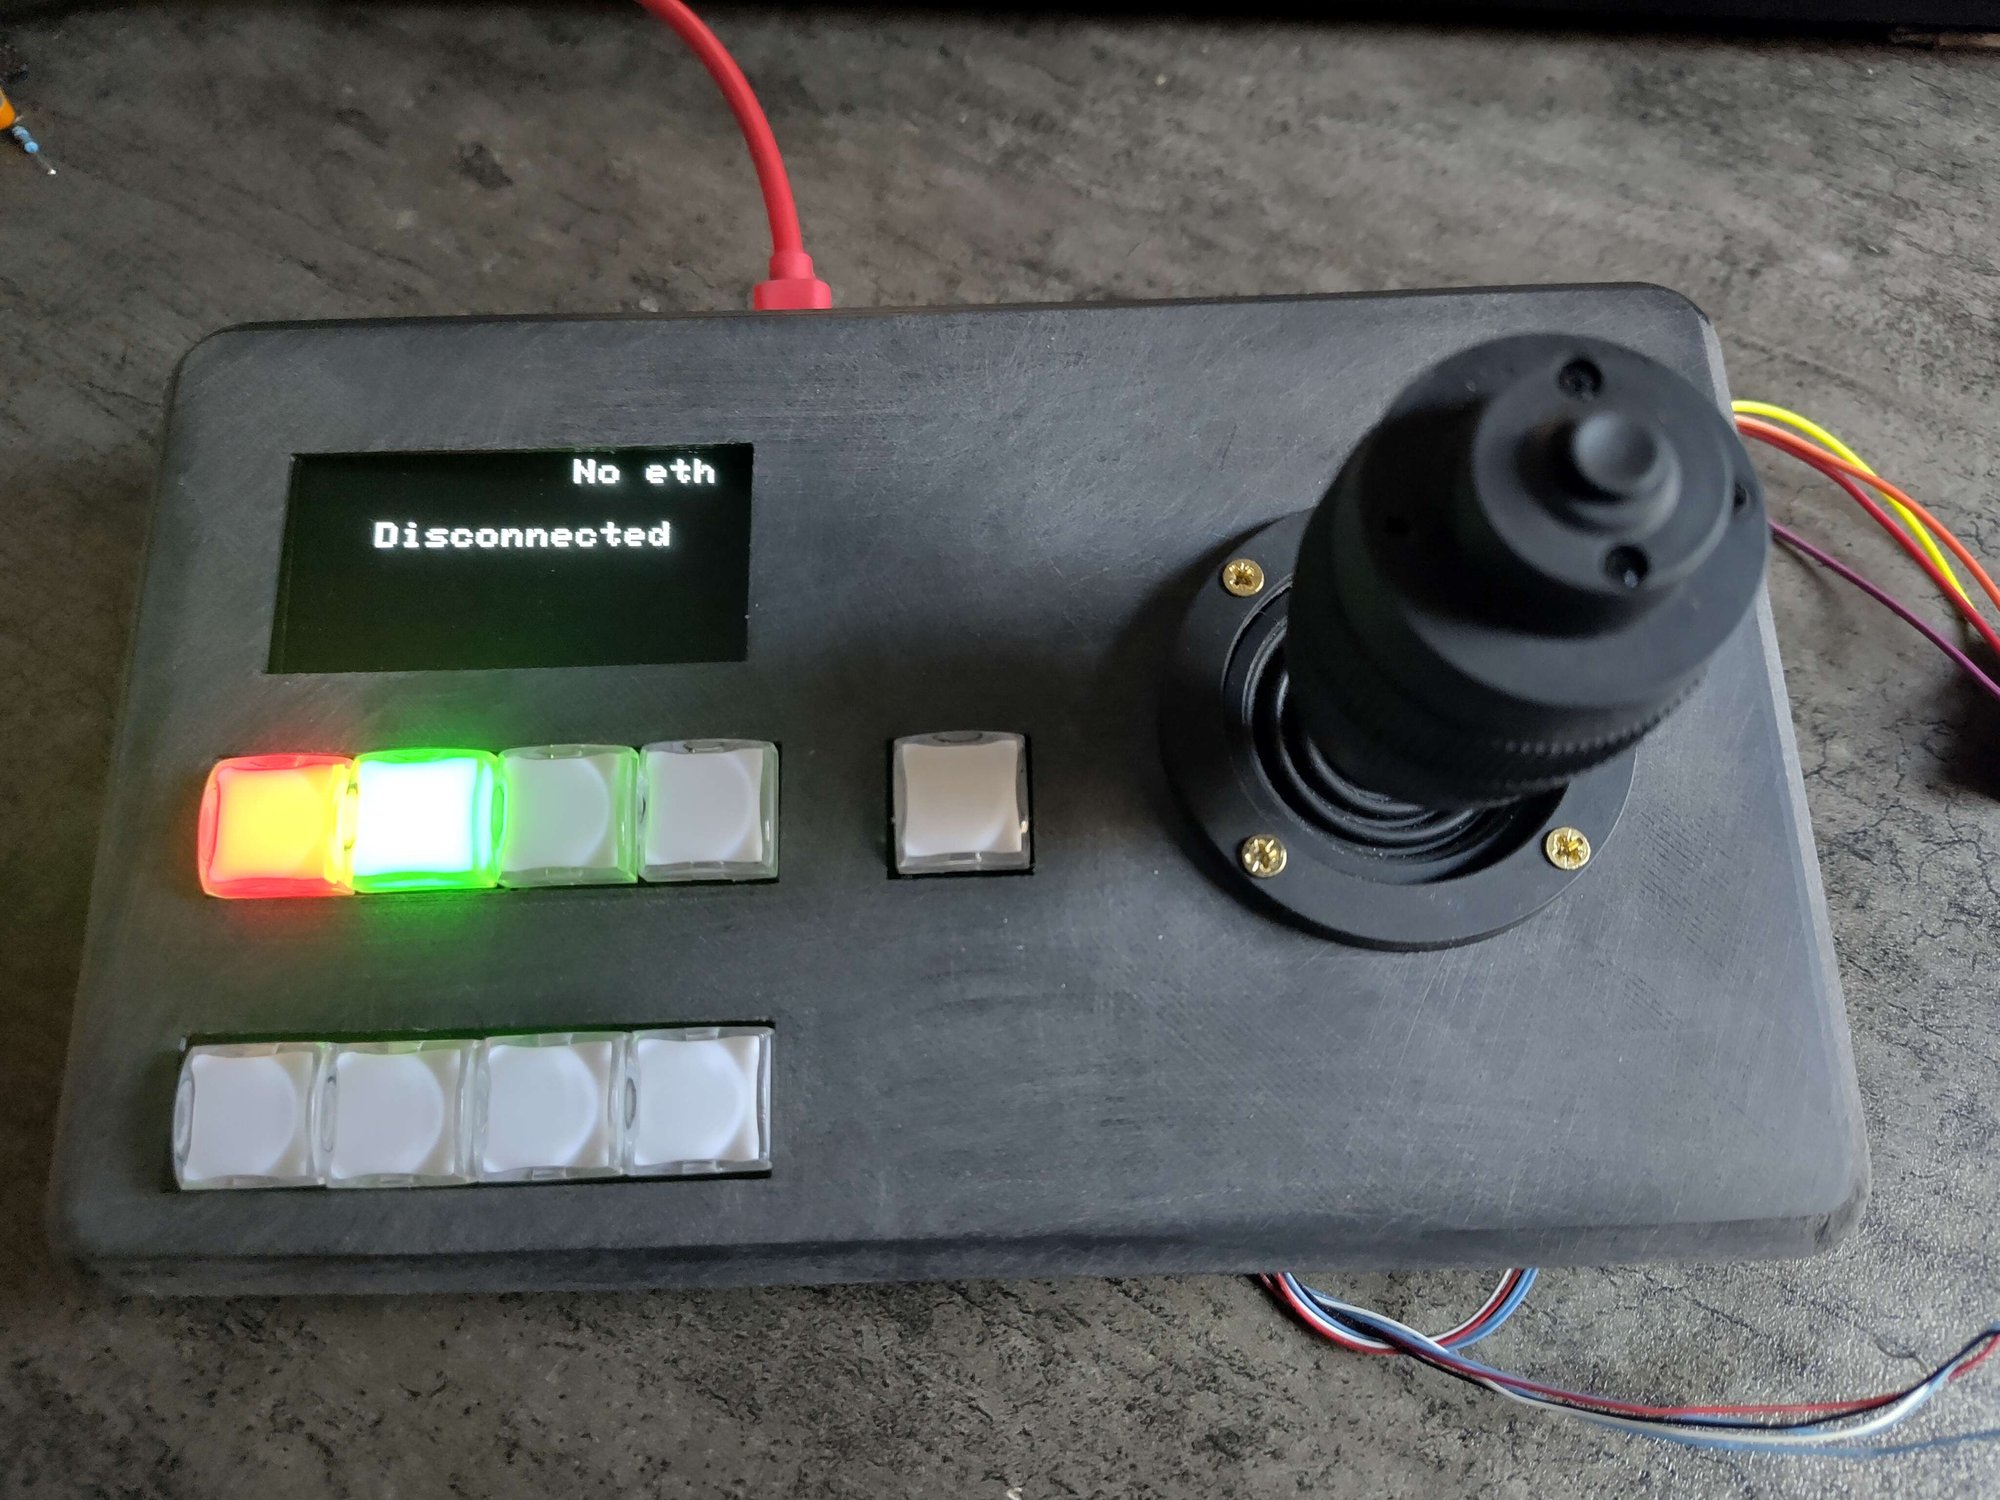
After a bit of designing I figured the most minimal design I can get away with is 9 buttons, the joystick and a display for the user interface. The hardware design has gone through several iterations over the last year but I now have some PCBs with the 9 RGB buttons on it, the $10 joystick that was also in the Marshall-clone panel and to interface with the outside world it has the TP8485E to communicate with the cameras over RS-485 and a Wiznet W5500 module to communicate with the video switcher over ethernet.
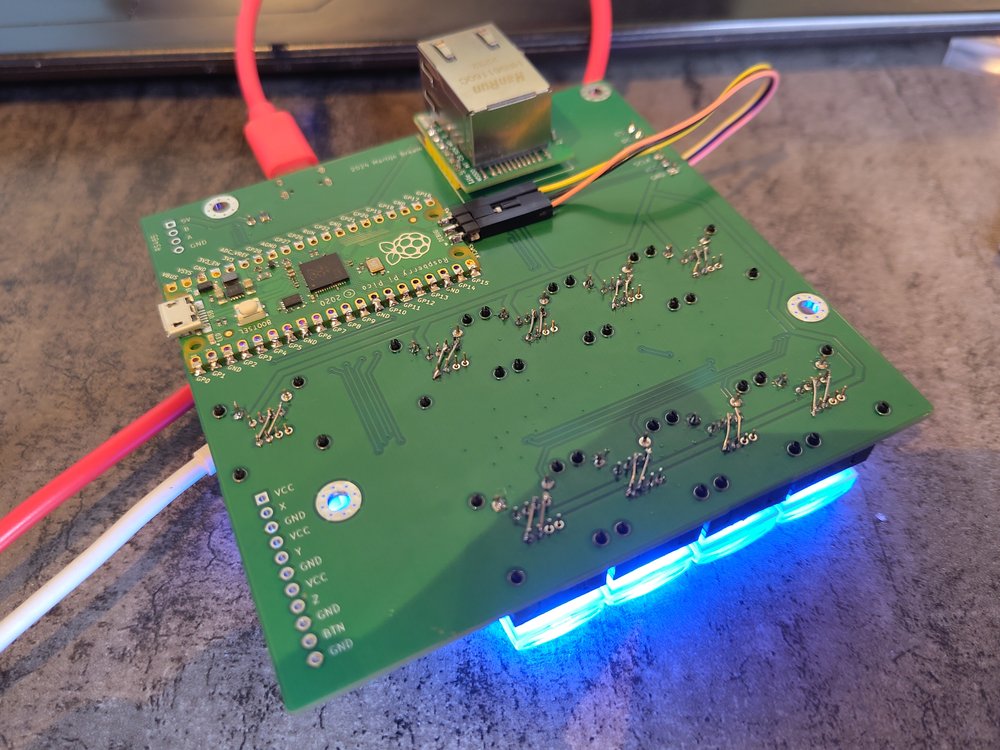
After a lot of fixing of the board I had made I now have all the hardware parts functional, but the difficult part of this project is the software.
Initial software
I first started creating the software like I do all the RP2040 based projects. A cmake project that pulls in the pico-sdk. To make anything work at all I dedicated the second core of the pico to dealing with the Wiznet module and the first core then handles all the user interface I/O. This worked fine to blink some leds and I did implement a DHCP client that ran on the second core. It did make implementing the rest of the system a lot more complicated. There's simply a lot of things that need to happen at once:
- Draw an user interface on the display that's somewhat smooth
- Send out VISCA commands over the RS-485 interface
- Respond to button presses
- Keep the entire network stack alive with multiple connections
There's a bunch of things that need to happen on the network, the first of which is some actually standards complicant DHCP support. This would require keeping track of the expire times and occasionally talk to the DHCP server to keep the lease active. The second background task is making mDNS work. The ATEM video switcher IP can be autodiscovered using DNS-SD and it would be great to also announce the existence of the control panel.
The ATEM protocol itself is also one of the harder parts to get right, the protocol itself is pretty simple but it does involve sometimes receiving a lot of data that exceeds the buffer size of the Wiznet module and the protocol has a very low timeout for disconnection for when you stop sending UDP datagrams to the ATEM.
This all made me decide that it's probably better to switch to an RTOS for this project.
FreeRTOS
The first project I've looked into is FreeRTOS. This is technically already bundled inside the pico-sdk but all tutorials I've found for this download a fresh copy anyway so that's what I did. FreeRTOS seems to be the simplest RTOS I've looked at from this list, the main thing it provides is the RTOS scheduler and some communication between tasks. The simplest way I can show it is with some code:
#include "FreeRTOS.h"

TaskHandle_t button_task = NULL;
TaskHandle_t led_task = NULL;
QueueHandle_t led_queue = NULL;

void buttonTask(void *param) {
    while (1) {
      bool state = get_button_pressed();
      xQueueSend(led_queue, &state, 0);
    }
}

void ledTask(void *param) {
    while (1) {
        bool state;
        if(xQueueReceive(led_queue, &state, portMAX_DELAY)) {
            gpio_put(LED_PIN, state);
        }
    }
}

int main() {
    xTaskCreate(buttonTask, "Button", 128, NULL, 2, &button_task);
    xTaskCreate(ledTask, "Led", 128, NULL, 2, &led_task);
    vTaskStartScheduler();
    // Code will never reach here
    return 0;
}
Both the buttonTask and the ledTask function will seem to run in parallel and there's a few IPC systems to move data between the various tasks. The code above is not functional but I stripped it down to get the general usage across.
I've used this for a few days to make an enormous mess of my codebase. I have created several tasks in my test project:
- The buttonsTask that polls the i2c gpio expander to check if buttons have been pressed and then put a message on the button queue.
- The ledTask that sets the right RGB color on the right button by putting a message on the ledQueue;
- The mainTask that runs the main loop of the project that updates the state based on the button presses.
- The networkTask that communicates with the Wiznet module.
- The dhcpTask that is spawned by the networkTask when a network cable is plugged in.
- The mdnsTask that is spawned by the dhcpTask once an ip address is aquired.
- the atemTask that is spawned by the mdnsTask when it gets a response from an ATEM device.
- the viscaTask that does nothing but should send data out the RS-485 port.
This is a lot of tasks and the hardware doesn't even do anything yet except appear on the network.
I ran into a few issues with FreeRTOS. The main annoying one is that printf simply caused things to hang every single time which makes debugging very hard. Sure the gdb debugger works but it's not neat for dumping out DHCP traffic for example.
The FreeRTOS also doesn't seem to provide any hardware abstraction at all which means all the code I wrote to communicate with the various chips is not easily re-used.
After a few days I created a new clean FreeRTOS project and started porting the various functionalities from the previous version over to try to get a cleaner and more manageable codebase but ended up giving up because blind debugging because there's no serial output is quite annoying. I decided to look what the alternatives have to offer.
Apache NuttX
Another seemingly popular RTOS is NuttX. This project seems a lot closer to what you'd expect from a regular operating system. It makes your microcontroller look like an unix system.
First thing the tutorial tells me to do is fetching the pico-sdk and set the environment variable. No problem, I already have the sdk in /usr/share and that environment variable already exists on my system. Suprisingly this made the build fail because NuttX decides that it really needs to overwrite the version.h file in my pico-sdk for which it doesn't have permissions... why...
After doing the initial setup of building a minimal NuttX firmware for my board I connected to the serial port and was greeted by an actual shell.
nsh> uptime
00:01:34 up  0:01, load average: 0.00, 0.00, 0.00
nsh> uname
NuttX
nsh> uname -a
NuttX 12.5.1 9d6e2b97fb May  6 2024 15:18:54 arm raspberrypi-pico
It looks like I'd just be able to write an app for this operating system and have it auto-launch on boot. Since this tries to do the Unix thing it also has a filesystem of course so the hardware has FS abstractions like /dev/i2c0 and /dev/adc0.
One thing I liked a lot was that it's build around menuconfig/Kconfig which I'm already used to for Linux development. This also means there's an actual hardware driver system and the GPIO expander chip I've used for the buttons already had a driver. The menuconfig system also allows me to configure the pin muxing of the rp2040 chip so I don't have to keep constants around with pin numbers and do a bunch of hardware setup to make my i2c bus work. I can just go into the menuconfig and tell it that i2c0 of the pico is used and that it's on two specific pins. I've also enabled the i2c testing utility as one of the apps that will be build into the firmware.
nsh> i2c dev 0 79
     0  1  2  3  4  5  6  7  8  9  a  b  c  d  e  f
00: -- -- -- -- -- -- -- -- -- -- -- -- -- -- -- --
10: -- -- -- -- -- -- -- -- -- -- -- -- -- -- -- --
20: -- -- -- -- -- -- -- -- -- -- -- -- -- -- -- --
30: -- -- -- -- -- -- -- -- -- -- -- -- -- -- -- --
40: -- -- -- -- -- -- -- -- -- -- -- -- -- -- -- --
50: -- -- -- -- -- -- -- -- -- -- -- -- -- -- -- --
60: -- -- -- -- -- -- -- -- -- -- -- -- -- -- -- --
70: -- -- -- -- -- -- -- -- -- --
nsh>
Well uuuuh... yup the basics aren't working. I've spend a bit of time going through the rp2040 setup code and the various i2c related menuconfig options but it seems like this just doesn't really work...
Update: This actually works fine but I managed to make a config mistake that broke the i2c bus, I have gotten the board to work more now on NuttX and will write a more detailed update post in the future for this. Consider the rest of this section as most likely invalid.
I also have not figured out yet how I can tell NuttX that my gpio buttons are behind the gpio extender, or how to actually link the gpio extender to my non-functional i2c bus.
Another thing that annoyed me is that I had to re-clone the nuttx repository multiple times simply because sometimes one of the configure.sh commands would fail which would leave the repository in an inconsistent state and the distclean command wouldn't work because the repository was in an inconsistent state. Really the classic "configure.sh: you are already configured; distclean: you are not configured yet"
Unix-like seems great at first glance, but I don't really want to deal with filesystem paths on a microcontroller for a pretend filesystem. I also don't need a shell in my production system, it should just run my code.
Zephyr
So next on the list is Zephyr. This provides a python utility to set up a project which should make things a bit easier, or it's a sign something is terribly overcomplicated.
The very first thing this project does is pull in 5GB of git repositories which includes the entire HAL library for every chip under the sun. The second thing it does is for some reason mess with my user-wide cmake stuff on my system.
After that the tutorial told me to install the Zephyr SDK:
The Zephyr Software Development Kit (SDK) contains toolchains for each of Zephyr’s supported architectures, which include a compiler, assembler, linker and other programs required to build Zephyr applications.
It also contains additional host tools, such as custom QEMU and OpenOCD builds that are used to emulate, flash and debug Zephyr applications.
Yeah no thanks, I have already several perfectly fine ARM toolchains and I don't really want to either build or fetch precompiled compilers for every architecture Zephyr supports, lets see if I can get away with not installing this.
After some messing around I figured out how to get away with it. There need to be two command line options set for cross compiling:
$ export ZEPHYR_TOOLCHAIN_VARIANT=cross-compile
$ export CROSS_COMPILE=/usr/bin/arm-none-eabi-
$ west build -p always -b sparkfun_pro_micro_rp2040 samples/basic/blinky
One thing I also found out is that the Raspberry Pi Pico is not actually supported, only other boards that have the same SoC. No worries, these boards are practically the same. The very second issue I hit is that the blinky demo doesn't build because it requires led0 to be defined to have something to blink.
It turns out the Sparkfun pro Micro RP2040 does not actually have a simple gpio led to blink but a ws2812B adressable led.
So I started following the custom board manual which told me to copy a random other board because that's how it always goes. Maybe if you already have a meta tool to set-up a project make it create this scaffolding.
In the end I did not manage to build for my board because it simply wouldn't start to exist after fixing all the errors and warnings in the build.
Conclusion
Well at least with FreeRTOS I managed to building some of my own application. I guess I have to follow the online instructions of replacing printf with another printf implementation and make sure to call the different function everywhere.
I'll probably continue on trying to get FreeRTOS to do the things I want since it's the only one that can be simply integrated in your own environment instead of the other way around.