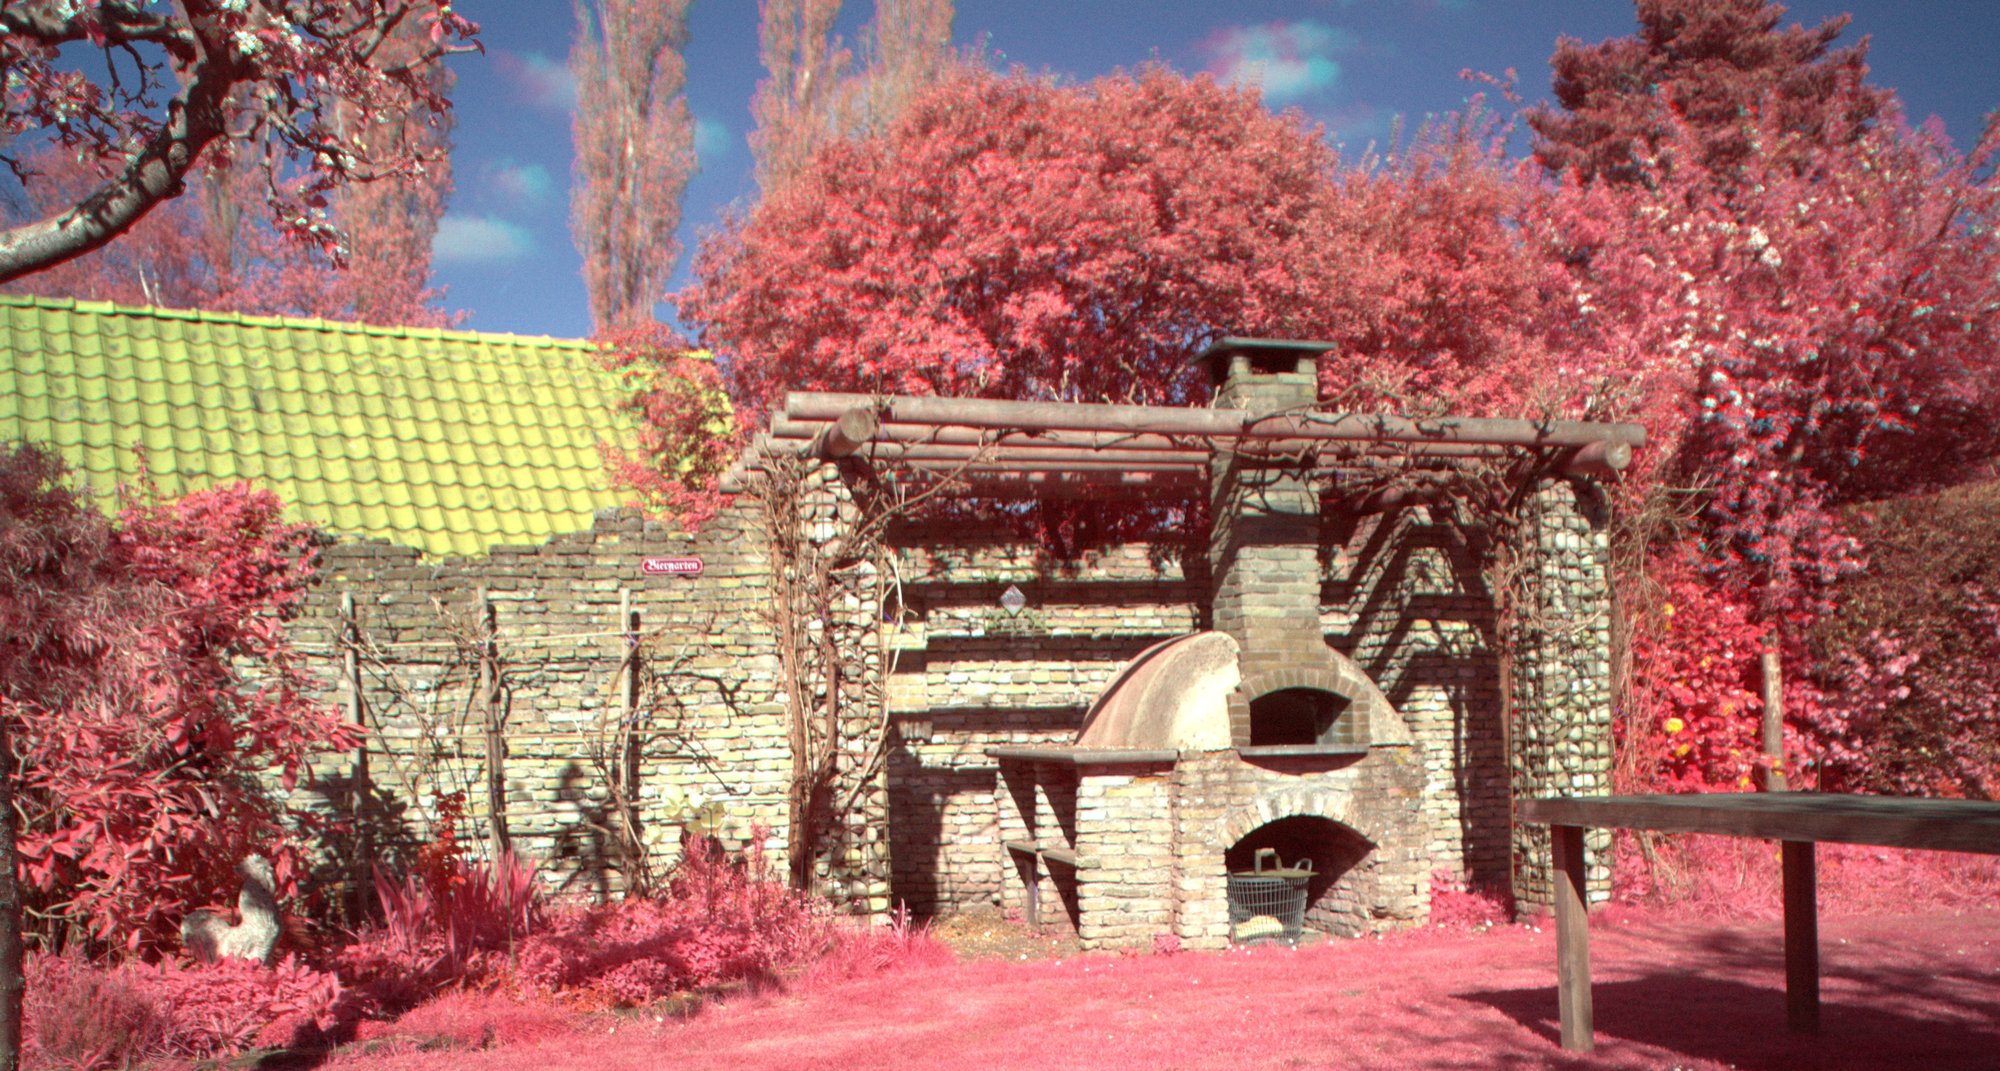
A long long time ago in the 70s there was a lot of interesting film being made. At this time film was used for everything, professional and consumer cameras, movies, aerial photography. A lot of time has gone into recreating film looks for digital cameras now to reproduce the color response of the old film cameras.
One of the more popular examples of this is the Fujifilm X-series digital cameras that have film simulations built in. I've heard they are quite good but those cameras are quite expensive and I find it a bit useless to get a seperate camera for just that trick.
One legendary film stock you won't see simulated on anything like this is Kodak Aerochrome III Color Infrared. This film was originally produced for aerial photography. Most infrared film is black and white film that's also sensitive to infrared. What makes Aerochrome so special is that it's a color film that is infrared sensitive and uses false color to visualize the infrared spectrum.
While it's not possible to get real Aerochrome anymore it is possible to get the datasheet for it. This old datasheet has a great explanation of why this film exists, how it works and has color spectrum sensitivity data.
Color film is made from multiple layers of photosensitive material. Each layer has a different sensitivity spectrum and will produce a specific color when developed. For example one layer will be sensitive to red light and when developed will produce a cyan dye. This will create the negative image on the color negative. When this negative is inverted it the cyan will become the red part of the image again.

But the color produced on the negative doesn't have to correlate with the original color that was recorded. When the spectrum of the sensitive layer doesn't correlate with the produced color dye it's called false color film.

The scale for this datasheet is quite different because it has to include the infrared spectrum. One important thing to note is that the Aerochrome film is normally used in combination with a yellow filter on the lens, this will remove most of the blue light from the photograph. Then the false color is mapped so that infrared light will create cyan which inverts back to red. The red sensitive layer will produce magenta and develop to green. The green sensitive layer will produce yellow dye which produces blue on the final image. All the three layers are also sensitive to blue light which is why the filter is used together with this film.
Reproducing on a digital camera
The difficulty with reproducing this film is that cameras are designed to be not sensitive to infrared light. Even if the infrared light filter is removed from a camera the infrared light will just be detected as regular red light. This is not very useful because for the proper false color the visible red light should be shifted to green while the infrared should stay red. My solution to this is taking two pictures. One regular picture to capture the normal color spectrum and one with a R72 filter. This filter in front of the lens will let only light above 720nm pass which is exactly the part of the infrared spectrum I need.

To the naked eye this filter just looks black since human eyes aren't sensitive to infrared light. On my camera it produces a way more interesting result though.

This is the infrared light stored into the red channel of the picture. Now the trick to make this looking like aerochrome is combining the R and G channels from the normal picture and the R channel from the picture with the IR filter. This is annoyingly hard to do correctly with most software, especially if you need to align the images.
Custom software
So aligning two images and some very easy color manipulation is something I had already written before in postprocessd. I made a copy of this software and changed the pipeline to align the IR image on top of the RGB image. Since this is using libraw you can just feed it any supported camera raw file.
After stacking the images are combined into a single 4-channel RGBI image. Then a 4x3 matrix is run over this image to get the final 3-channel RGB output.

Yep, doing it this way is probably overkill compared to scripting a series of imagemagick commands. But it does allow the flexibilty of doing more complicated transforms than just moving the color channels around. The datasheet says to use a yellow filter because all the layers are sensitive to blue light, so what happens if I modify this matrix to leak blue light into it?

Mixing in the blue channel into the three other channels will lower the contrast of the image a bit, it also makes the sky a lot lighter again since... that was quite blue.
Since I have this option I added the -y argument to the tool to disable the yellow filter.
My software for this is available on https://git.sr.ht/~martijnbraam/aerochrome


Can this be done realtime?
One neat feature of the Fujifilm X-series cameras is that it gives a live preview of the film look while taking the picture. Since this process needs two pictures that would be impossible unless Fujifilm develops a sensor where IR cells are added to the bayer matrix.
Another option is hacking up somthing yourself. This is probably doable with a raspberry pi 4 compute module and two sensors, one regular IMX219 sensor and one NOIR option with the visible light filter added. To make it always align this can be shot through a beamsplitter prism which can be very small with these sensor sizes.

