
To execute CI jobs on the hardware there needs to be a format to specify the commands to run. Every CI platform has its own custom format for this, most of them are based on YAML.
My initial plan was to use YAML too for this since it's so common. YAML works just good enough to make it work on platforms like GitHub Actions and Gitlab CI. One thing that's quite apparent though is that YAML is just not a great language to put blocks of shell scripting into.
image: busybox:latest

before_script:
  - echo "Before script section"
  - echo "For example you might run an update here or install a build dependency"
  - echo "Or perhaps you might print out some debugging details"

after_script:
  - echo "After script section"
  - echo "For example you might do some cleanup here"

build1:
  stage: build
  script:
    - echo "Do your build here"
Blocks of shell script are either defined as lists like the example above or using one of the multiline string formats in YAML. This works but is not very convenient.
Design constraints
There is a few things that the job format for PTS needs to solve. The main thing being that jobs are submitted for multiple devices that might behave slightly differently. Of course it's possible to use some conditionals in bash to solve this but leaning on shell scripting to fix this is a workaround at best.
The things that I needed from the common job execution formats is a way to specify metadata about the job and a way to specify commands to run. One major difference with other CI systems is that a test job running on the target hardware involves rebooting the hardware into various modes and checking if the hardware behaves correctly.
Here is an example of the job description language I've come up with:
device: hammerhead
env {
  ARCH: aarch64
  CODENAME: lg-hammerhead
  BOOTLOADER: fastboot
  PMOS_CATEGORY: testing
  NUMBER: 432
}

power {
  reset
}

fastboot (BOOTLOADER=="fastboot") {
  flash userdata http://example.com/${CODENAME}/userdata.img
  boot http://example.com/${CODENAME}/boot.img
}

heimdall (BOOTLOADER=="heimdall") {
  flash userdata http://example.com/${CODENAME}/userdata.img
  flash boot http://example.com/${CODENAME}/boot.img
  continue
}

shell {
  username: root
  password: 1234
  script {
    uname -a
  }
}
This format accepts indentation but it is not required. All nesting is controlled by braces.
The top level data structure for this format is the Block. The whole contents of the file is a single block and in the example above the env, power etc blocks are.. Blocks.
Blocks can contain three things:
- Another nested block
- A Definition, which is a key/value pair
- A Statement, which is a regular line of text
In the example above definitions are used to specify metadata and environment variables and the script itself is defined as statements.
Blocks also have the option to add a condition on them. The conditions are used by the controller daemon to select the right blocks to execute.
This is just the syntax though, to make this actually work I wrote a lexer and parser for this format in Python. This produces the following debug output:
<ActBlock act
  <ActDefinition device: hammerhead>
  <ActBlock env
    <ActDefinition ARCH: aarch64>
    <ActDefinition CODENAME: lg-hammerhead>
    <ActDefinition BOOTLOADER: fastboot>
    <ActDefinition PMOS_CATEGORY: testing>
    <ActDefinition NUMBER: 432>
  >
  <ActBlock power
    <ActStatement reset>
  >
  <ActBlock fastboot: <ActCondition <ActReference BOOTLOADER> == fastboot>
    <ActStatement flash userdata http://example.com/${CODENAME}/userdata.img>
    <ActStatement boot http://example.com/${CODENAME}/boot.img>
  >
  <ActBlock heimdall: <ActCondition <ActReference BOOTLOADER> == heimdall>
    <ActStatement flash userdata http://example.com/${CODENAME}/userdata.img>
    <ActStatement flash boot http://example.com/${CODENAME}/boot.img>
    <ActStatement continue>
  >
  <ActBlock shell
    <ActDefinition username: root>
    <ActDefinition password: 1234>
    <ActBlock script
      <ActStatement uname -a>
    >
  >
>
Now the controller needs to actually use the parsed act file to execute the task. After parsing this is reasonably simple. Just iterate over the top level blocks and have a module in the controller that executes that specific task. A power module that takes the contents of the power block and sends the commands to the pi. Some flasher modules to handle the flashing process.
Developer friendliness
The method to execute the blocks as modules is simple to implement, but something that's very important for this part is the developer friendliness. Testing is difficult enough and you don't want to have to deal with overly verbose specification languages.
It's great that with conditions and flashing-protocol specific blocks an act can describe how to flash on multiple devices depending on variables. But... that's a level of precision that's not needed for most cases. The fastboot module would give you access to run arbitrary fastboot commands which is great for debugging but for most testjobs you just want to get a kernel/initramfs running on whatever method the specific device supports. So one additional module is needed:
boot {
  # Define a rootfs to flash on the default partition
  rootfs: something/rootfs.gz

  # For android devices specify a boot.img
  bootimg: something/boot.img
}
This takes the available image for the device and then flashes it to the most default locations for the device. This is something that's defined by the controller configuration. On the non-android devices specifying the rootfs would be enough, it would write the image to the whole target disk. This would be enough for the PinePhone for example.
For Android devices things are different ofcourse. There most devices need to have the boot.img and rootfs.img produced by postmarketOS to boot. For those the rootfs can be written to either the system or userdata partition and in many cases boot.img can be loaded to ram instead of flashing. For test cases that can run from initramfs this would mean no wear on the eMMC of the device at all.
With this together a minimal test case would be something like this:
device: pine64-pinephone

boot {
  rootfs: https://images.postmarketos.org/bpo/v22.06/pine64-pinephone/phosh/20221012-1246/20221012-1246-postmarketOS-v22.06-phosh-18-pine64-pinephone.img.xz
}

shell {
  username: user
  password: 147147
  script {
    uname -a
  }
}
The boot module will take care of resetting the device, powering on, getting into the correct flasher mode, flashing the images and rebooting the device.
After that it's just shell blocks to run actual test scripts.
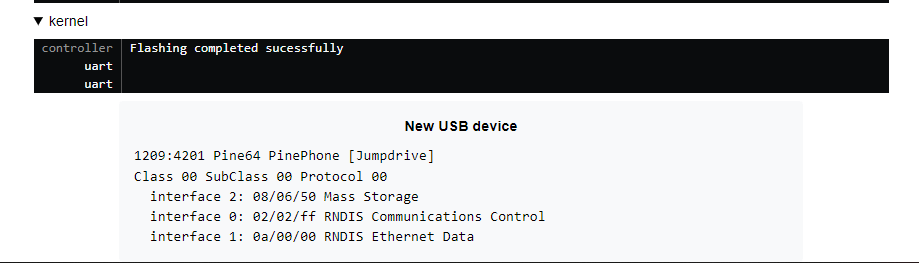
After implementing all of this in the PTS controller I made a small testjob exactly like the one above that loads the PinePhone jumpdrive image. Since that image is small and easy to test with.
Detecting success and failure
One thing that's a lot easier in container test scripts than on serial-controlled real hardware is detecting the result of test jobs. There's not multiple streams like stdout/stderr anymore, there's no exit codes anymore. The only thing there is is a string of text.
There's two solutions to this and I'm implementing both. The first one is specifying a string to search for to mark a test as sucessful or failed, this is the easiest solution and should work great for output of testsuites.
shell {
  username: user
  password: 147147
  success: linux
  script {
    uname -a
  }
}
The other one is moving from uart to telnet as soon as possible. If a test image just has telnetd in the initramfs and IPv6 connectivity then the controller can automatically figure out the IPv6 link local address on the phone side and connect to the device with telnet and a preset username/password. This is a bit harder with IPv4 connectivity due to multiple devices being connected and they might have overlapping addresses.
One a telnet session is established something closer to a traditional CI suite can function by sending over the script and just executing it instead of automating a shell.
telnet {
  username: user
  password: 147147
  script {
    uname -a
  }
}
Beside this the other blocks can signal a failure. The boot block will mark the test as failed when the device could not recognize the boot image for example.
Next up
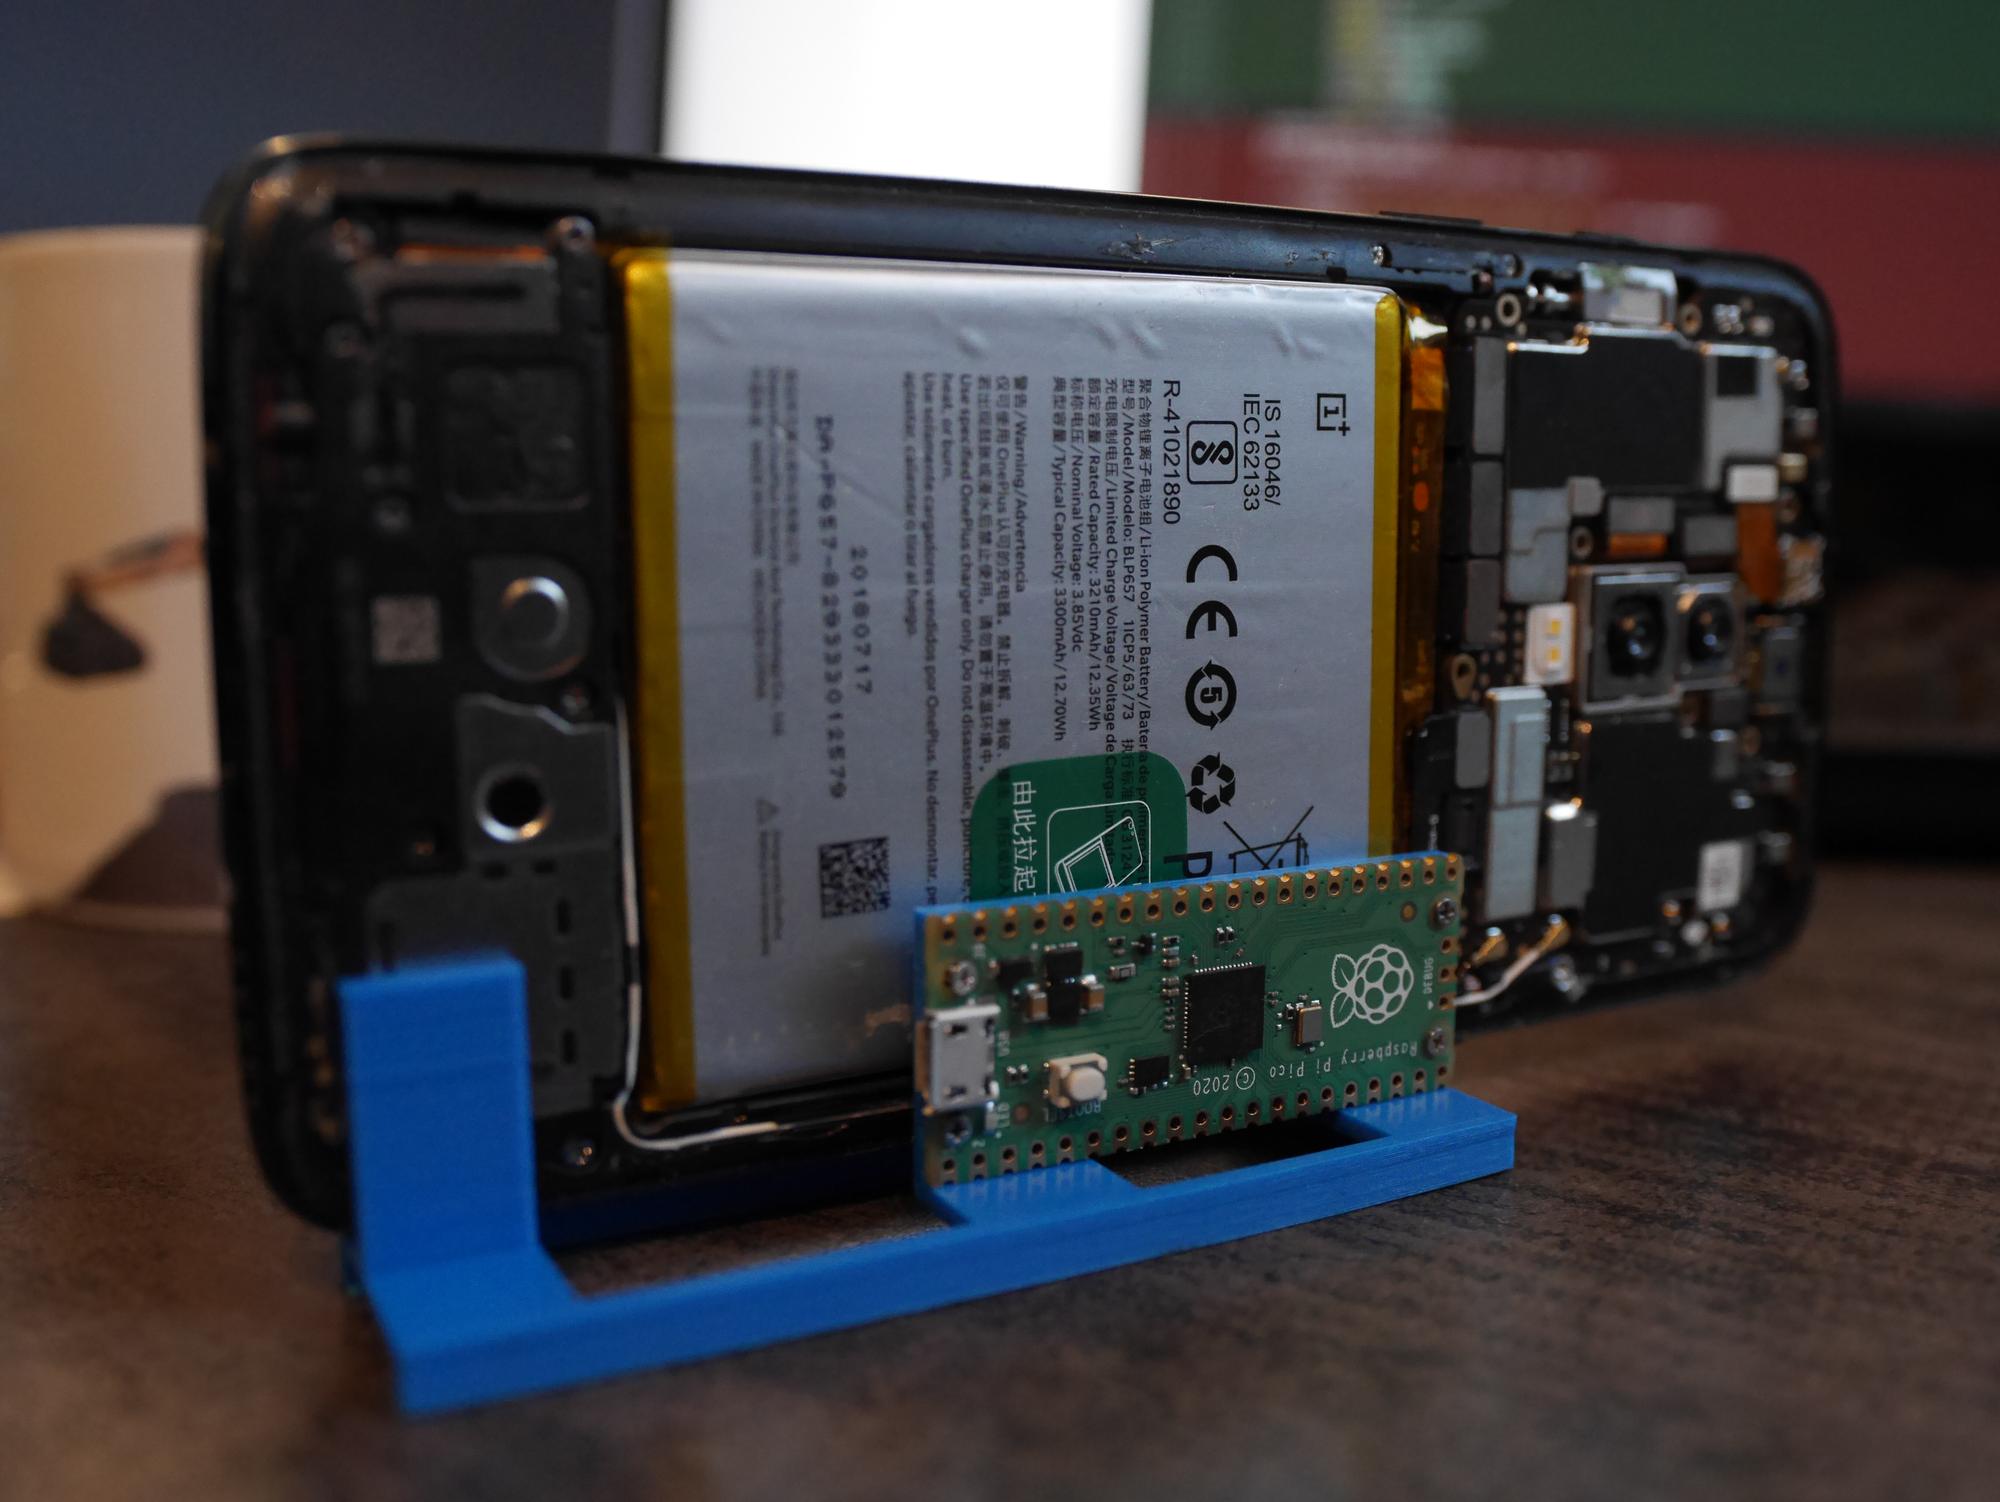
With this all the major components have their minimal required functionality working. The next steps is building up the first rack case and deploying an instance of the central controller for postmarketOS. I've already been printing more 3D phone holders for the system. One of the prototypes of this is teased in the top image in the article :)